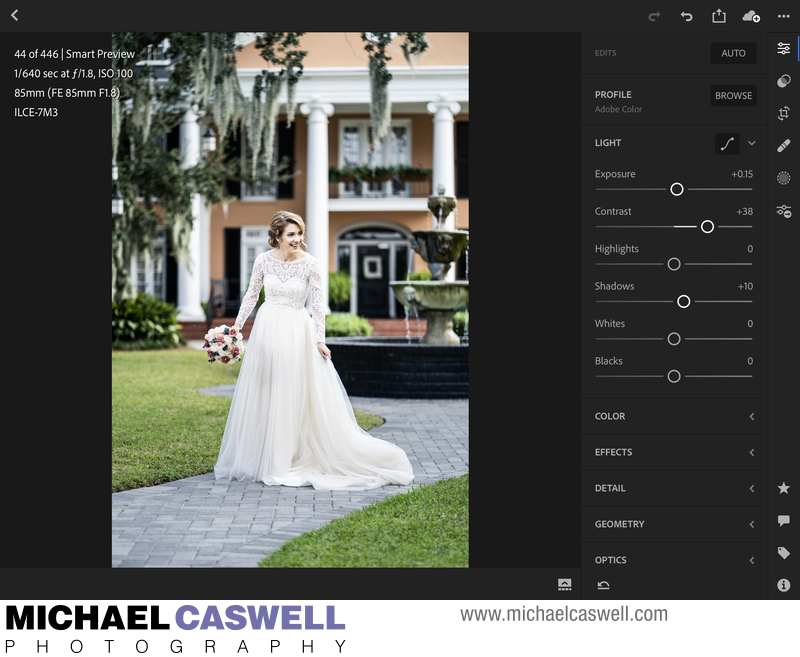
Working in Lightroom Mobile on an iPad
One thing that surprises people when they first start using LR Mobile is how capable it is. For instance, I rely heavily on the Graduated Filter tool, and when I decided to try LR Mobile a few years ago it was a foregone conclusion to me that, of course, the iPad app was not going to have this feature. I was quite surprised when I fired it up for the first time that it did indeed support Graduated Filters (and numerous other features I didn’t expect to see). There were a few other things missing at that time, but features have steadily been added to give it almost complete parity with the computer versions of Lightroom, with very few exceptions.
Some Limitations of LR Mobile
One notable example of something you currently cannot do in LR Mobile is red-eye reduction. While not something that I use often (since I usually bounce flash), I do occasionally have a need for it when I'm not able to bounce and must shoot direct flash. Your best bet here is to simply flag or set a higher star rating for any image that needs red-eye reduction, so that you can quickly and easily identify images needing this treatment once you're back on the computer.
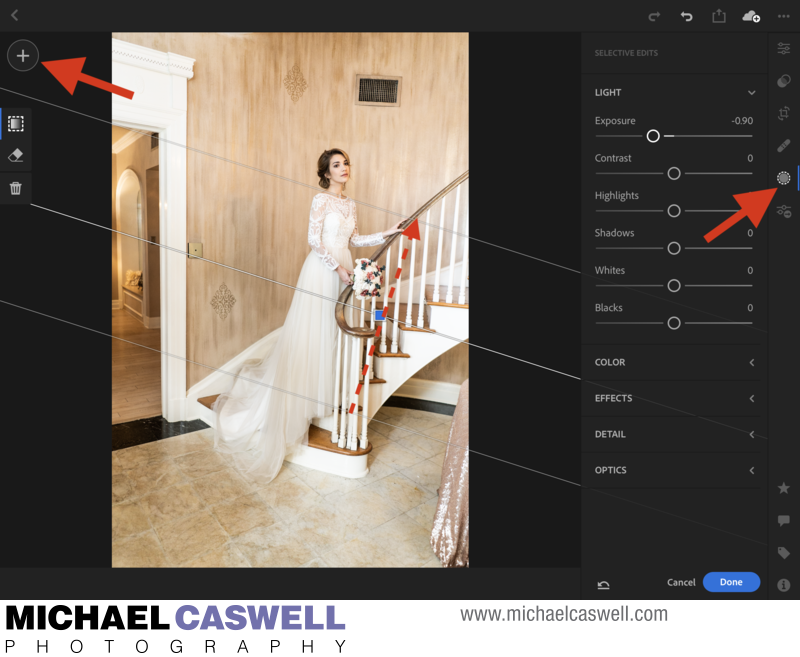
Another area where LR Mobile lags a bit is with regard to Adobe's revolutionary new masking tools, introduced in late 2021. To the credit of the developers, you do actually have access to AI masking when working on the iPad in the form of the primary features of this tool, Select Subject and Select Sky. Although there is no Select Background command, you can accomplish this with an extra couple of taps by doing Select Subject and then using the Invert command. You can also build complex masks by using the Add and Subtract commands. What's missing? In LR Mobile, you cannot currently create masks of individual people as you can in LR Classic, nor can you select precise attributes of those people (eyes, face skin, hair, clothing, etc.), nor is the Select Object tool available. Presumably these options will be available on the iPad at some point.
You can, however, at least partially use some of these more specific masking tools by way of Adaptive (AI) Presets. An assortment of these presets come pre-installed, and you can download others or create your own.
I would say for the way I work, the biggest omission is the ability to quickly sync the develop settings of a group of images all at once. Note, in this context, "sync" does not refer to syncing images to Adobe's cloud server as it does throughout the rest of this article. What I mean is that in Lightroom Classic, if you have a number of images that were all shot in the exact same conditions and all need an identical adjustment, you can make the adjustment to the first image, select the rest of them, and sync the develop settings very quickly.
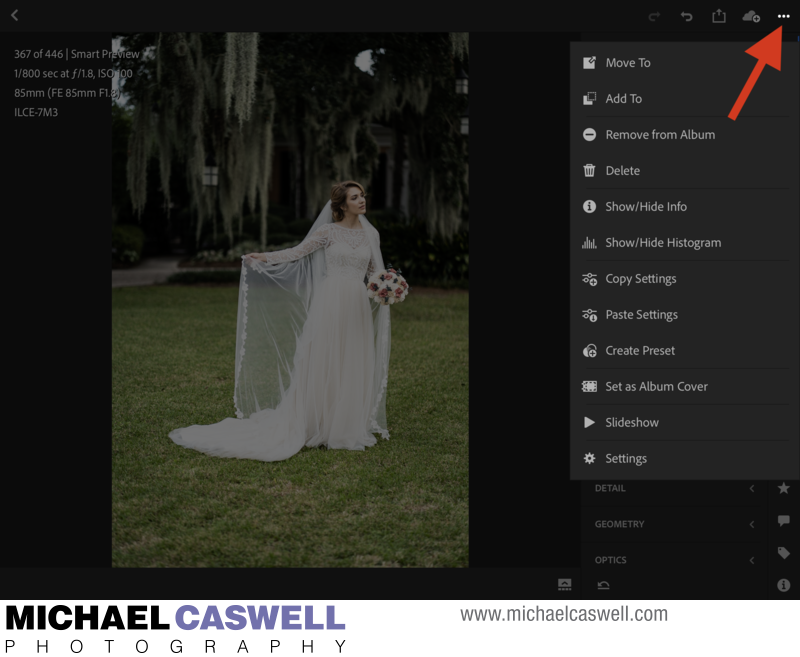
This capability, to a limited degree, was added to Lightroom mobile in a November 2019 update (long-tapping on an image in grid view enters the multi-image selection mode). But it's a bit cumbersome to use, as in its current implementation, it's not easy to specify that just certain types of adjustments be copied. In other words, in grid view (which is where batch copy/paste is implemented), you can only copy all the adjustments that have been made to an image, not just, say, only the white balance. You can, however, select just certain adjustments to be copied when you're in develop mode (in other words, when editing an individual image), by way of a pop-up window that appears when you select Copy, and in turn you can then go back to grid view and paste this selective group of settings onto multiple images. It's a bit of a sloppy workaround, and hopefully Adobe will add the ability to designate just certain settings to be copied in the batch copy/paste operation.
Even better, however, would be a Sync button, similar to what Lightroom Classic has, that would enable you to select multiple images, and sync the settings (all, or just selected settings) of the first one to the others, rather than having to copy from one image, select the others, and then paste.
It also should be noted that pasting settings onto a large number of target images is not a near-instantaneous operation as you may be accustomed to on the desktop. On my iPad Pro, pasted settings are applied at a rate of about three images per second, which while an improvement over the approximately one second per image that it used to take, will still cause a bit of a wait if you need to paste settings to a hundred images.
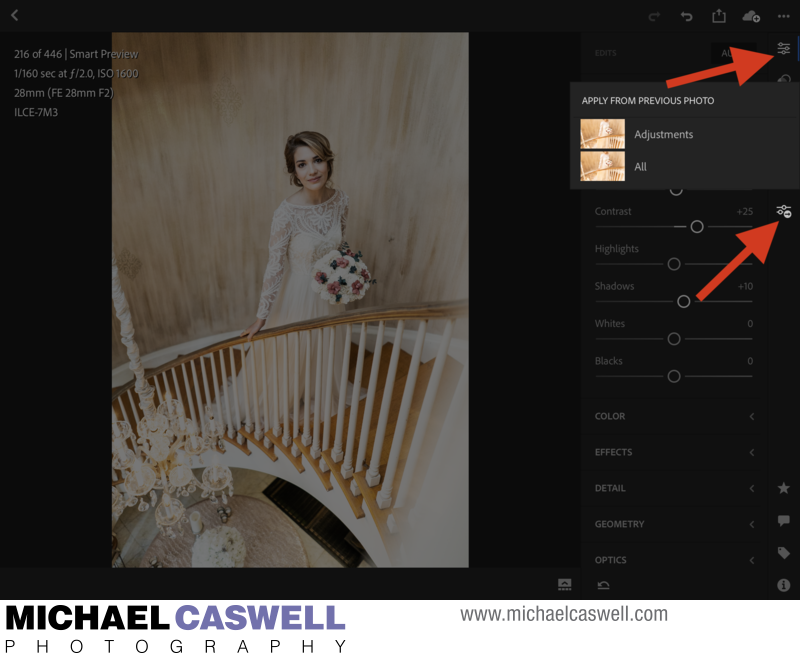
The other main option for applying edits from one image to others is the “Apply from Previous Photo” buttons, which let you quickly apply the settings from the last image after you swipe to the current one, and you can also copy and paste from one image to another individual image.
A Suggestion for Batch Adjustments
While I certainly welcome Adobe's recent addition to LR Mobile of batch copy/paste of adjustments, as mentioned above the implementation is not yet as useful or efficient as I'd like it to be, so I generally try to avoid using it unless I absolutely have to.
For my work, the need for syncing settings to groups of images most often occurs with white balance adjustments. Rather than fussing with getting the white balance perfect on the job, I almost always make these adjustments during the editing process, since there's no image quality penalty for doing so when you shoot RAW. If I'm shooting in warm artificial light with a gelled flash, I'll usually set my WB to tungsten just to provide more natural looking images on the back of the camera for aesthetic purposes when, but in most other conditions I'll be on auto white balance.
During many portions of typical wedding day photography coverage, the white balance will change often, even when shooting in the same space. For instance, during the bridal prep coverage in the hotel room, there may be 3 or 4 different light sources at any given time (daylight from the window, warmer room lights, cooler LEDs from the makeup artist's light or mismatched bulbs in the room's fixtures, and your own flash if you are using it), and the color temp will vary in different parts of the room depending on your proximity to these various light sources. Similarly varying lighting conditions can also exist in the ceremony and reception spaces. So, this will often require WB adjustments to each individual image (or to relatively small groups of images).
However, there may be instances where large sequences of images have identical lighting, such as during the main portion of a church ceremony, the formal group photographs, or a reception space where the color of the lighting is consistent. A habit I've developed over the years (even before I started working in LR Mobile) is, as a first step in the editing process, to quickly scan through the thumbnails on the computer, identifying these similar large groups of photos, and making the batch white balance adjustments before I do anything else. This literally takes just a minute or two, and whether I'm subsequently editing on the computer or on the iPad, I find that making this batch pre-adjustment of white balance is the most efficient method.
I also do not typically make any noise reduction adjustments to individual images as part of my LR Mobile workflow (or even when working on the computer version, for that matter). I have adaptive luminance and chroma noise reduction settings for each ISO level that are automatically applied upon import into LR Classic just as a default starting point, and then as a final step once all editing is complete, I use Jeffrey Freidl's very useful Bulk Develop Settings plugin. This plugin analyzes your images and applies user-definable levels of noise reduction depending on not only the ISO setting of each image (which is somewhat redundant, since I have LR set to automatically apply similar settings during import based on ISO), but more usefully adds further noise reduction for images that have had exposure and/or shadows increased (since these adjustments will usually result in an increase of visible noise). It's highly configurable, and can also automatically apply several other types of adjustments in addition to noise reduction.
Other User Interface Considerations
There are some other UI differences in how some of the tools are used that can make them a little bit slower to use compared to Lightroom on the computer. The above mentioned Graduated Filter tool is a good example. On my computer, I previously used an app to enable customized keyboard shortcuts in Lightroom, but at present am using a Monogram Creative Console hardware control surface. As a result, for instance, if I come across an image that needs the sky darkened, I just hit a button on the Monogram which I have defined to select the Graduated Filter tool, and drag to create the gradation, and if the default adjustments that I usually leave set for this tool are satisfactory (which they usually are), that’s it. Otherwise a few quick turns of control knobs will dial in what is needed or that particular image.
On the iPad, there are a few more steps involved, with three taps on icons to get me to the point where I can begin to drag the Graduated Filter, then another couple of taps to make the necessary adjustments (they always start out at zero). A major encumbrance? Absolutely not, but it’s just something to be aware of.
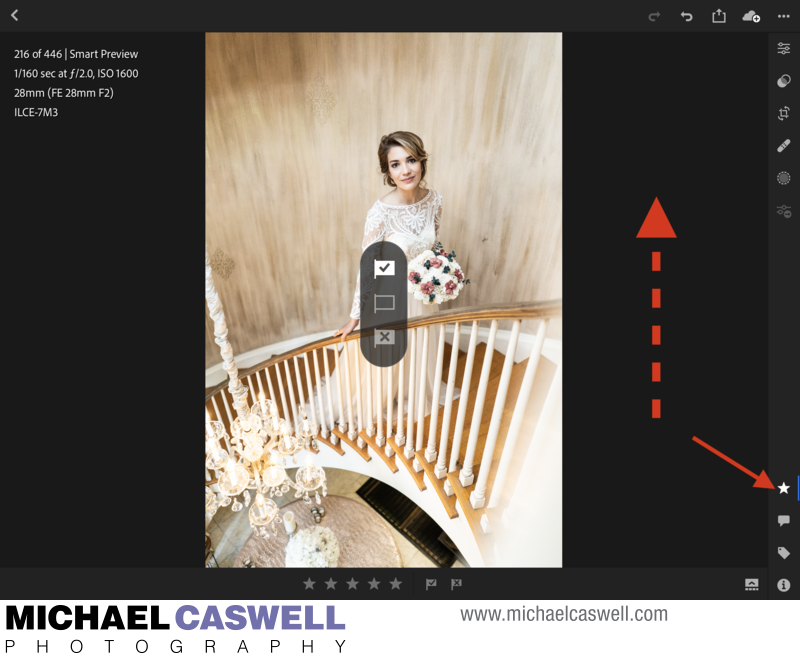
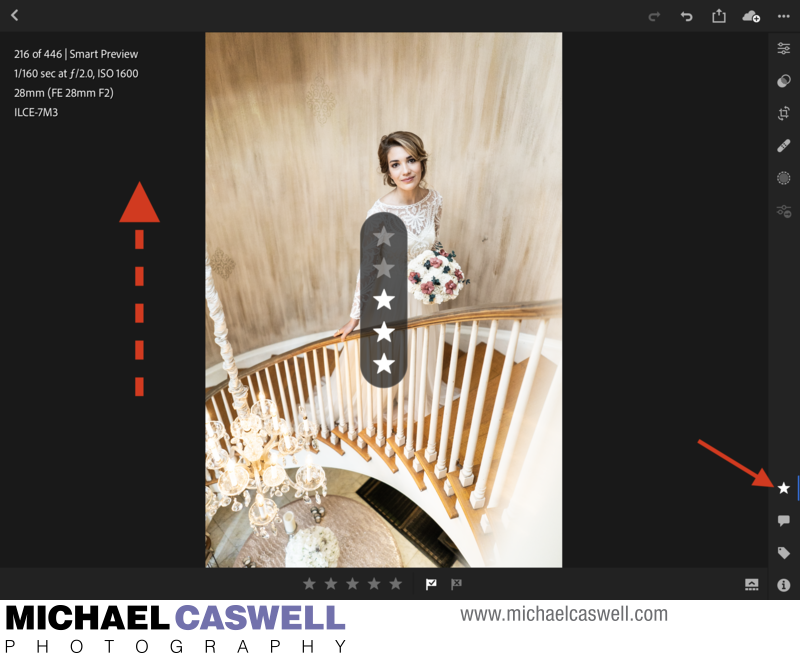
Similarly, when you’re in “editing mode” on the iPad, flagging an image as a Reject involves more steps than simply hitting X on the computer keyboard, and this is an example where I believe Adobe moved in the wrong direction in the evolution of LR Mobile. In an earlier version of the app, the user could enable “Speed Flagging/Rating”, which allowed you to simply swipe up or down to Flag, Unflag, or Reject an image (as well as increase or decrease the Star Rating). But this feature was later removed, not completely, but rather more compartmentalized into a separate area. Before, you could Speed Flag/Rate while you were in the Edit tab. In the current version, Flagging and Rating is only available if you first tap on the Star icon in the lower left to enter the Rating tab.
This may sound like a relatively small issue, but in actuality it does have a substantial impact on how I work, as what was before just a swipe is now (when in the Editing tab) a tap-swipe-tap. As a result of this, you may find it more efficient to adopt a two-pass editing system, where you do one quick pass strictly for culling (staying in the Rating/Flagging screen, to avoid those extra taps), then another more deliberate pass for making adjustments to your images.
Incidentally, culling is very fast in LR Mobile once you get the hang of it. If you stay in the Rating tab, you can quickly swipe from image to image, swiping up to flag a shot as a pick, or swiping down to reject. Make sure you set up the filter to hide rejects, as this saves you from having to swipe to the next image after you mark one as a reject (if rejects are hidden, it will automatically advance to the next shot).
Cropping is intuitive and easy. Dragging corners will crop, and dragging outside of the image will enable you to rotate it manually. You can also hit the "Straighten" icon to have Lightroom automatically attempt to straighten the image based on horizontal or vertical lines it detects as being present in the image.

iPad Orientation
Lightroom Mobile can be used in a vertical or horizontal orientation. As you can see in the series of screen shots below, because of the adjustment panels located along the right side of the screen, while the iPad is being held in a vertical orientation, a landscape image will be displayed considerably smaller with a substantial amount of wasted space above and below it, while with the iPad held horizontally, the available space for display of images is roughly square, resulting in portrait and landscape oriented photos being shown about about the same size.
You can hold the iPad in the orientation that matches the images you are working on, and while this does result in portrait images being displayed larger when the iPad is held vertically, if the job is a mix of horizontal and vertical images, it's best to just keep the iPad horizontal.
Using Presets in Lightroom Mobile
LR Mobile has the standard assortment of Presets (accessible by the second icon from the top along the right side, just below the Edit icon), and you can import your own if you'd like. Unfortunately, you cannot do so directly from Lightroom Classic. You must instead use Lightroom CC (which is included in your Adobe Creative Cloud Photography Plan) as an intermediate step, as presets in this app will automatically sync to LR Mobile.
Alternatively, because LR Mobile does allow you to create your own presets within the app, you can effectively bring in your existing presets by applying them individually to a series of scratch images that are synced to the cloud, then creating each preset from those images in LR Mobile on the iPad.
Undo/Redo and History
A word of caution, though you have multiple levels of undo/redo in LR Mobile, this resets each time you swipe away from the current image. In other words, if you make a series of adjustments to an image, and then decide that you don't like them, you can easily step back with the Undo button at the upper right of the screen. But once you move to another image, that previous image's edits are no longer undoable. You do still have the ability to reset any image's edits with the button near the lower right, which has options to reset everything back to the default, or, likely a more usable choice, to reset back to when the image was imported into LR Mobile.
So, unlike LR Classic on the desktop, the complete edit History of each image is not permanently retained. However, whenever an edit or batch of edits is synced to LR Classic, these changes will have an entry in that image's History, each appearing simply as "From Lr mobile". That doesn't necessarily mean every individual edit performed in LR Mobile will be listed. When you are working with an image on the iPad, changes are typically not synced to the server until you swipe to the next image (or if you tap "Force Sync"), and each of these groups of edits made to an image will appear as a "From Lr mobile" entry in History.
Backing Up Your Work
As outlined earlier, unless you implement a workflow in which all of the full RAW files are uploaded, only Smart Previews (downsampled RAW proxies) are uploaded to Adobe's cloud server. So, you still need to maintain multiple backups, including off-site, for a safe level of redundancy with your clients' precious images (and even if you do upload your full RAW images to the server, you still need local backups).
Keep in mind, as edits to your photos are made on your iPad or other mobile device, and these changes are synced to the server, you should periodically ensure that this work is backed up as well. Though I'e never encountered any kind of catastrophic sync issues, it's best to be cautious. To backup your editing work, open Lightroom Classic on your main computer, wait as necessary to allow the sync operation to finish, then quit the app. At this point, the LR Classic catalog file has been updated to contain any edits performed on the synced images, so, assuming you already have existing backups of the RAW or DNG files themselves, making backups of that catalog file serves as a snapshot of the edits present on the cloud server.